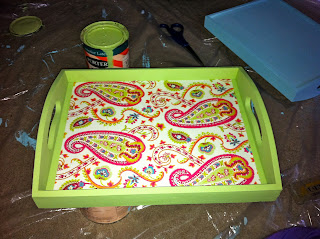
So I wanted a DIY project for Christmas gifts this year...SO...after checking out one of my favorite design blogs, Isabella and Max, I decided on making pretty little trays like she did here. Now hers were quite small, like for jewelry or keys ,yada yada ...but I decided on my gifts being a larger tray although I did make a couple of the small rectangle ones. Don't know what I will do with those yet...they may be headed to your house in the form of a hostess gift in the near future...well not these exact ones, obviously, mine are probably less pretty and definitely less polished and exact but I'm new at this DIY/craft thing.
So here how you can do it...
1. Gather supplies:
*Cute scrapbooking paper (I think hard to come by at my local stores)
*Trays of the size and shape you choose
*Paint brushes
*Glue (I used Martha Stewart) or Mod Podge
*Paint
*Water based polyacrylic (to seal it with after you finish the glueing and painting)
*Ruler
*Scissors
*Pencil
2. Paint
No need to paint the surface of the tray as it will be covered with paper. But I recommend painting the bottom just so its "finished looking". I took me 2-3 coats to get a good color, but the painting is quick. I painted with a larger paint brush than those shown above. Those were for finishing touches and glue.
Carebear, my crafting helper!
Oh and add to the supply list:
*Drop cloth...that's what is shown above.
(I'm not your grandmother with a plastic mat down over the carpet so the little ones don't make a mess of the carpet.)
*Hair dryer...if you want to speed up the drying process.
3. Take accurate measurements of the inside surface of the tray. (This can be tricky...if you're me anyway.) Then mark it off on your favorite paper and get to cutting.
All my PT friends out there, Yes you are correct I am using a goinometer as a ruler. Believe it or not, its the only ruler I could find. Very uncrafty of me I know. This is kind of ruler I want...But I don't even know where to find one.
Maybe Caity at Craft Day is the Best Day can tell me. She's my crafting mentor and idol!
4. Apply the glue to the surface of the tray.
5. Slowly apply the paper and try to press it flatten out the paper. If you're like me, there will be wrinkles, but oh well...its character.
6. WAIT...let the glue dry!
7. Paint it with several coats of polyacrylic!
Waalaa... Little trays.
Big trays.
Warning: The green is not as neon as it appears!
Yes...cell phone pictures. Blogger FAIL. Sorry guys.
But that's it. Fun gift. Fun craft. Fun Fun.


No comments:
Post a Comment