Tuesday, August 30, 2011

I will be back...

I know you think I'm never going to post again.  Trust me I'm going crazy not posting.  I have like a hundred ideas to post BUT...  I am trying SO HARD to stay away.  I MUST STUDY!  I have a huge test next week in culmination of everything I have ever learned in school.  Ridiculous.  So prayers would be very appreciated.  I promise to be back in little over a week.  But until then I'll be keeping a list of all the things I need to post about.

Miss you!  Hope you miss me back!

Wednesday, August 24, 2011

Autumn Really Is My Middle Name!

These past couple of days as I stood in the back yard in my pj's and bedhead watching Paisley eat sticks and chase bugs, I detected a gentle chill in the air.  Then before my eyes, leaves slowly floated like feathers to the grass.  Sigh.  It was beautiful and got my think tank really revving with ideas.  Its fall y'all!  I am bursting with excitement for harvest decorating and craft ideas.  

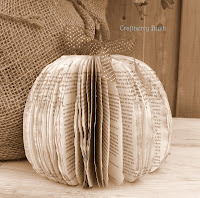
You may remember last year when I posted about one of my first fall crafting experiences with Crafty Caity Shinnick. (I know I am always name dropping her but I can't help it.  She's so talented.)  We made these.
I loved it and can't wait to pull it out of the attic this year.

Here are some of the things I am most excited about and some of my favorite inspirations for this fall.
You can find the links to these projects on my Pinterest here.  

Can't wait to try some of these out with you this fall!

Sunday, August 21, 2011

A Giveaway NOT to be Missed!

You know I would never leave you guys out of the loop on anything BIG in life.  So I would be crazy if I didn't let you in on one of my favorite things in life...Caity Shinnick design and a giveaway!  What an amazing combination!  I'm sure you know how much I love Caity from all the posts here.  She creates the most amazing stationary, invitations, announcements, jewelry, ...basically everything!  She is an stunningly talented designer and a beautiful woman of God.  Who doesn't want to celebrate her new website?!  

Caity is giving away all of her favorite things!
And mine too!  
I'm ecstatic...Obviously you can tell...
 And I am entering the giveaway every way I can.  So you better hustle over to Caityshinnick.com and check it out before you miss out on all the fun!  The giveaway link is on the left hand side near the top.

The Big Day Has Finally Come

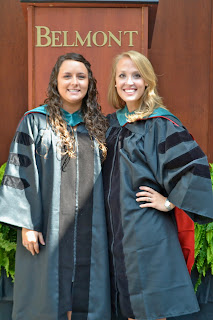
I know I'm a week late, but this event could not be overlooked.  I mean if I blog about what I made for dinner last night then I can't ignore my doctoral graduation!  It was a very fun two days of celebrating with my classmates, family, and friends.  

Meet my classmates:
They have been my sanity, my partners, my encouragement, my comic relief for the last 3 years of being holed up in a classroom without windows for 8 hours a day.  You heard me right, we had no windows for the 1st 2 years.  I think it has to be some kind of torture method to encourage further studying.
We like to have fun too!
The official graduation festivities began with our hooding.  It's wear the doctoral hoods, part of our ceremonial regalia, are officially placed on us.  We had to take lots of pictures.
Being hooded by Dr. Halle, the head of our department.

 I'm maybe a little excited to show off my new attire.

Graduation dinner.  Basically a game of how many times we can pass Cubby back and forth over the table and make him laugh.

The official graduation was boring but exciting nonetheless.  I am thankful for an august graduation that is small and slightly less formal.  Now that the whole family is here its time for more pictures.  Unfortunately, the lighting is poor.  
 Finally, Dr. Courtney Steele, DPT
 Everyone wants a picture with Cubby.
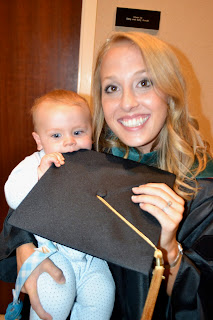
We tried to make Coleman wear my hat.  He did not approve but chose rather to eat it.  Typical 8 month old...Putting everything he can in his mouth.  Luckily he is the cutest thing in the Cross family and we let him do whatever (that is safe that is and if its okay with his parents.)

Sorry for all the pictures, but I just got them from my sister and I like pictures.  Thanks for bearing with me for the past 3 years.  I know I have been moody, short, stressed out, and exhausted, and you all have been encouraging, understanding, and a great support system.  I appreciate it more than you know!

Friday, August 19, 2011

Part 3: No-Sew Fabric Flowers!

I'm super excited about our last day of the fabric flowers tutorials.  If you didn't catch the first two days, you can find them here and here.  I loved making this kind because its new, super easy and super cute!  However, I know some of you are just excited the fabric flower craze is ending today.  I guess in the end everyone is happy.  Some of you with your new fabric accessories and some of you with your i-hate-flowers-and-tutorials sanity back.  So let's dive in.

Part III:  Rolled Fabric Flower

Supplies:
Fabric of your choice
Hot glue gun
Felt
Scissors
Headband, brooch pin back, or bobby pin

Let the rolling begin!
1.  Heat up the glue gun.
2.  Tear a 1"-ish strip of fabric.  I used the scissors to start a small cut and then I tore.  I'm NOT a good tear-er.  I can absolutely N-O-T  tear a straight line, but no worries.  It didn't seem to effect the flower in the end.
3.  Fold the 1" piece of fabric in half like so.  I placed a dot of glue inside just to hold it.

4.  Begin rolling the flower like you are rolling up a ribbon.  After you have secured a tight center place a dot of glue to keep the fabric in place.

5.  Continue to roll as you gently encourage the fabric to roll out.  I didn't find that that there was a simple clean way to do this.  I just rolled with the punches and kept twisting it out.  Every so often place a dot of glue between the ribbon and the forming flower to make sure all of your hard work stays together.

6.  Keep on rolling until you run out of fabric or you reach the flower size of your choice.  I made all different sizes.
7.  Something mine ended up looking like a cone, especially if my fabric was too wide to start with.  So I just cut it off.  DIY is all about improvising right.

8.  Cut out a circle of felt and use your glue gun to place it on the bottom of the flower.
9.  Adhere the accessory of your choice.
I place a piece of felt over the base of the pin as well.  Basically only because that's what the crafty Caity Shinnick told me to do.  You should totally check out her new website!  It's amazing!  I love all of her stuff!

All done!  Wear them with pride.
 I made this one out of an old t-shirt that needed to be thrown away.  So I decided to upcycle it!  Worked perfectly and it was FREE!
I made a trio set to wear together on a white tee or as individuals.

You can find a more professional tutorial here if you want more details.  I don't take the best pictures I know.  I hope you guys and gals are inspired to whip out some fabric flowers.  Who needs to sew when you have a glue gun?  That's my philosophy.

Soon I will post about my GRADUATION (picture me saying that like Oprah because I am!) and one of my favorite and more frustrating new DIY project.  See you soon!

Wednesday, August 17, 2011

Part 2: No-Sew Fabric Flowers

Part II of the No-Sew Fabric Flower tutorials.  If you missed the folded fabric flower from yesterday you can run back and read it here.  

The  Button Flower

Supplies:
2 Fabrics of your choice (if you do one like mine)
A pretty button
Hot glue gun
Felt
Pen for tracing
Scissors
Headband, Bobby pin, or Brooch pin back

1.  Heat up your glue gun.
2.  Cut a nickel or quarter size circle out of felt as your base.
3.  Cut out 4 large circles and 4 medium circles, as shown above.
4.  Fold a large circle twice until it forms a triangle.  Place the newly folded circle on the felt like a pie-piece using your hot glue.

5.  Continue placing the larger circles until the "pie" is full.

6.  Repeat steps 4 and 5 with the medium circles.

7.  Place button of your choice on top!

Now, show off your new flower in your hair, on your bag, on a pillow in your den...wherever!
Key to making adorable fabric flowers...just relax and just your imagination.  As you can see I don't stress over perfection in my flowers.  I'm sure its driving some of your CRAZY, but its more fun to just chill and slap on some glue.  Now to using your imagination.  You can do anything.  What's great about crafts like this is making it your own.  You can use multiple buttons to stack for some added piazzazz!

Or you can do only a single layer for a more simplistic look.
Or use a fabric covered button or a rolled flower as the center.
(We will learn to make rolled flowers in part 3.)

Endless possibilities!  Hope you have fun making them like I did.
Related Posts Plugin for WordPress, Blogger...